Since I
thought that also foreign people could cook this simple recipe I have decide to
translate it for you. I am sorry for my Maccheroni English but I am sure that
my friends from all over the world can understand me the same. The translation unfortunately
will not be so ironic as the original… however, let’s go!!!
By chance
have you some stale bread? And what do you do with stale bread??? Do not you throw
it, isn’t it? Well, if you have some chickens or barnyard animals it is right if you give it
to them but since I believe that you have others kind of furry friends, this is
not your case. So? Zac… straight into the geek plan! Nooo, as old ages ( and
our ancient do it really) all everything that can be recycled, we recycle and we will give it a new life to combining it the best raw materials obtaining a beautiful cake and not only, you will feel
even a bit more "eco-friendly",
seriously this time!
Today, we create a cake that requires patience and of course a pinch of love. Because
of the period, we make it even a little horror…
But
first, a short introduction to one of the stars of the recipe:
The
“amaretto di Mombaruzzo”; it is from Piedmont, soft, with its sweet flavor / bitterness
from kernels differs
from the classical one, from
Saronno. Ok, for you maybe is too complicated to go to Piedmont but any
amaretto biscuits that you find at the supermarket it will be okay. (If you do
not find this kind of biscuits, also only stale breads does work).
But let's cut to the chase,
the ingredients, for the fact that the cake is a recovery cake, are a bit random,
trust your
instincts and to the pike dive finger in the mixture, yes yes, YOU CAN DO
IT!!!
Ingredients:
300
gr. Stale bread (don’t buy it, please!)
400
gr of Amaretti biscuits
Well,
we had more amaretti and less bread, if you have more bread and less amaretti, the ratio is 500 gr. of bread and 300 gr. of
Amaretti biscuits.
3
generous spoon of bitter cocoa powder
1
spoon and half of fine sugar
3
entire eggs ( in the pics you can see only two eggs, but the third has been added during remixing; it depends if your eggs are
little or big)
Peanuts
(60 gr. or more, it’s up to your taste)
Raisin
( It’s up to your taste, I don’t like raisin into the sweets, I like it on
pasta… yes, I am strange)
A
yolk of Cognac ( you will understand it)
Dry
breadcrumbs ( if you have a lot of stale bread and a good electric grater,
you can do it by your own, then you can store it in a tapperware with a bay
leaf, this helps to prevent from dampness)
Fresh
milk, 1 lt and a bit more
Convection
oven 180° C / 356° F for 1h 15’ / 1h 30’: your faithful friend toothpicks will help you understand if the cake is ready or not, just a little pierce and if it comes out clean just turned from crime,
the cake is cooked to perfection
Creative Stage
First
ingredients that you need will be the stale bread, the amaretti and the milk.
With
a lot of patient, dice the bread with a good bread knife, if you have miss the
Zumba lesson, don’t worry, you will make a successful training as same and then pour the milk, about ¾ of bottle.
After
that crumble the amaretti, my mother and
me have used a meat tenderizer always to do a little training and, in
that case was a sane punching ball and
add the crumble amaretti, not disintegrated eh!
Then
you will notice that the can that you have used it is too little so you need a
bigger one, change the bowl and the little one keep it aside, maybe you will
need it.
And
now is the cocoa moment, look it, it is marvelleous!!!
At
this moment I would already like to taste it!!! However add the milk slowly,
you should understand how much add it.
In
the second pic you can see that is more than the first one. Ah, a little
advise: when you use a wood spoon for the dessert, a little caution is
to take away it from the others wood spoons; wood is porous and it absorb all the smells. So it is better for the cake
to have a proper wood spoon; a small gesture to bring joy and to tantalize your taste buds.
Afterwards
mix with care, from the top to down and
if you believe in the magical movements always in clockwise.
 Now,
put the mixture in the previous can or let it in the used bowl, the important
is that the bowl can be well closed, because it is the moment that the mixture
goes to sleep in the fridge after the Zumba fitness, and also you, go to watch a good movie or go to have an hot bath
with your favorite book or go to get the cuddles: relax yourself!!!! You will
think tomorrow to finish the cake. Otherwise, if you are victim of “ all and now that I have
to do 9487593 things all contemporary and I cannot waste my time” you can use a
cookery robot or a minipimer, in that case you should dose and mix both milk and dry breadcrumbs ;
your mixture should be creamy/fluid/creamy, not fluid/creamy/fluid.
Now,
put the mixture in the previous can or let it in the used bowl, the important
is that the bowl can be well closed, because it is the moment that the mixture
goes to sleep in the fridge after the Zumba fitness, and also you, go to watch a good movie or go to have an hot bath
with your favorite book or go to get the cuddles: relax yourself!!!! You will
think tomorrow to finish the cake. Otherwise, if you are victim of “ all and now that I have
to do 9487593 things all contemporary and I cannot waste my time” you can use a
cookery robot or a minipimer, in that case you should dose and mix both milk and dry breadcrumbs ;
your mixture should be creamy/fluid/creamy, not fluid/creamy/fluid.
However,
we (that doing things as ancient people) have keep the mixture today after
lunch, because it was quiet in the fridge, well closed and safe from stink of
onions, salami and various cheeses.
Now
you need these.
First
put the eggs once a time and not too cold, it would be better if you take off
the eggs from the fridge some moments in advance when you prepare a cake, so,
add 1 egg and mix from top to down, add the other one and repeat the movement. If
your eggs are too little add one, you can use your common sense.
After
that is alcohol time! Your dose will be a half of eggshell, it is useless to dirty
other pottery!
Well
blend all the mixture and join the sugar, mix, join the dry breadcrumbs –
remember: creamy/ fluid/ creamy. Add a handful at a time and
turn, stir, be the mixture!!!
Now
just add peanuts, not all, and if you want also the raisin. You can soak the raisins for a bit
in a little cognac and water.
In
the meanwhile, if you have a daughter or someone round you, let herself do the
dirty job:
buttery the mold; I used a
silicone brush because I had the camera in my hands but if you can, use your
hand! It’s really funny! To take contact with the food is an atavistic
pleasure! When you will wash your hands, forget that the butter go away, you
can spread your elbows with it.
Trick:
pull out the butter in advance from the fridge it will be more workable. At this
moment of the recipe, you will switch on the oven. Once you have spread the
butter in the mold put the mold in the oven and count to 10, after that put off
the mold and add the dry breadcrumbs on the bottoms and sides, throw away the excess.
Tip
the mixture in the mold and with a spoon (licking pots??? I really do not find
this word translation…)
Beat vigorously on a countertop to
remove any air bubbles.
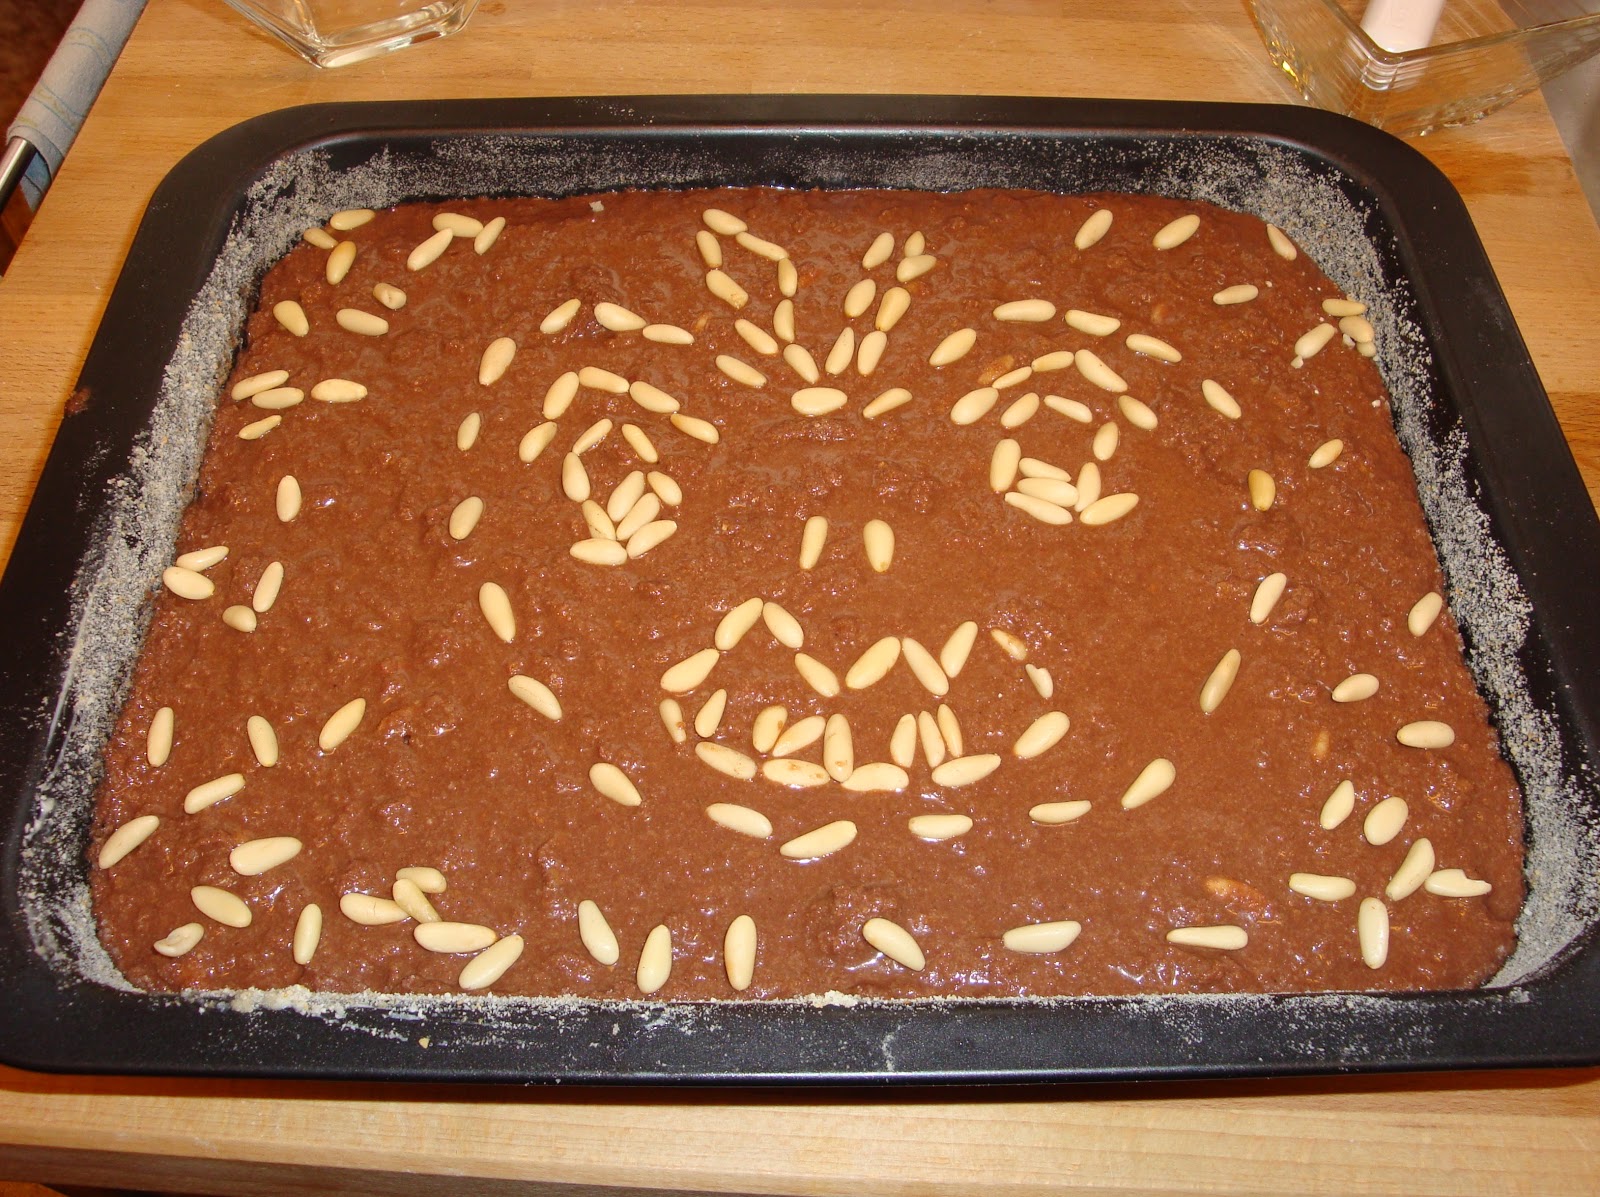
Keep
the remaining peanuts and decorate as your taste, we have made a terrifying and
horrific Jack O’Lantern.
Voilà!!!
is not magnificent this decoration? It took at least three quarters of an hour; we were
nearly that we
used a squad, rulers and engineering
programs… ok, it is a real homemade decoration.
Finally a sprinkle of sugar on the top will make a good crusty crunch!
Baked
for necessary time.
It
is really terrifying!!!